You’re not imagining it. Putting together a memorable Thanksgiving spread with all the classic side dishes and condiments for friends and family can be a daunting task. Between the planning, shopping, chopping and cooking, it’s easy to feel overwhelmed by the details. One surefire way to keep it all under control? Make some freeze-ahead Thanksgiving dishes—like frozen stuffing—before the actual holiday. That way you’ll reduce the amount of cooking that needs to be done during the festivities and free yourself up to enjoy the holiday. Sound good? Then read on for our top suggestions about which OXO kitchen tools to use and which recipes you can successfully make ahead of time.

Why Make-Ahead & Freeze? The Benefits for Thanksgiving

When it comes to successfully turning out a large meal, timing is everything—even if you’re making a cozy Thanksgiving meal for only a few guests. There’s an exact right moment to add various ingredients, and each side dish—like the perfect mashed potatoes or homemade cranberry sauce—requires different cooking methods and temperatures. That’s why making some parts of the meal in advance can be a game changer. Some of the key advantages are:

Less Day-of Stress

With fewer dishes to cook at the last minute, you’ll be better able to focus on the main event: A juicy, flavorful turkey, maybe even one with extra crispy skin.

Better Timing

It’s impossible to cook everything at once. Some items—such as roasted butternut squash or other seasonal root vegetables—require higher temperatures to achieve a caramelized outer layer. Meanwhile, cooking casseroles and pies, or even just warming up dinner rolls, calls for a more even temperature. Cooking what you can in advance frees up the oven for items that need to be cooked just before sitting down to eat.

Enhanced Flavor & Ease

It’s true: Some foods—like Thanksgiving leftovers—actually taste better the next day. That’s because the flavors have a chance to “bloom” and blend. Soups and lasagna are two great examples, but stuffing and sauces fall into this category, too.

Easy Organization

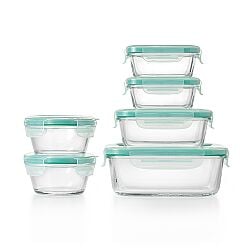
Pots, pans, mixing bowls—these essential pieces of equipment are usually in high demand on the day of your celebration. Making some dishes ahead of time and storing them in air-tight, glass containers will keep them fresh and preserve their flavor. Using stackable containers can also save space when your fridge is full. And storing your spices and pantry staples in containers that can be stacked and labeled will make it easier to grab what you need as you cook.

What You Can Freeze-and-Bake

Not sure what to make in advance and freeze? These suggestions can help you make a plan. Some surefire options are:

  • Stuffing—Bread holds up well to freezing and thawing.
  • Gratins—The high fat content from the cream and cheese protects potatoes from becoming mushy or grainy when thawed.
  • Mashed potatoes—Just like with gratins, the dairy and fat in mashed potatoes helps them stay firm when unfrozen.
  • Cranberry sauce—The sauce’s acidity and sugar content preserve the color and taste.
  • Rolls—Same as stuffing. In fact, you can make lots of your holiday baking ahead of time and thaw when needed.
  • Purees—Whether for pie filling, soup, and other sides, the smooth, even consistency remains unchanged by freezing and thawing.
  • Pie crust—Just like a crust purchased at a grocery store, pie crusts—and whole unbaked pies made from scratch—can go directly from the freezer to the oven.

Tips from OXO Experts

Before you get started, these tips will help you make your Thanksgiving dishes their best, even after a stint in the freezer.

Add a layer of cheese

For broccoli casseroles and mashed potatoes, adding an additional layer of shredded cheese on top in the last 30 minutes of reheating in the oven will prevent the top from drying out, and cover up any blemishes that may have appeared in the freezer-storing process.

Defrost and cook with foil

In the freezer, a storage container with a lid is the best way to protect the flavors and textures of your prepared dish. However, when it’s time to reheat, switch to foil, which will help retain moisture or liquid as the dish defrosts and cooks.

Go full fat

Skip the skim milk and go full-fat with plenty of butter or heavy cream when making mashed potatoes. Without the full-fat dairy, your potatoes will turn out watery when you re-bake them in the oven.

Pre-cook fruit for pie

Ensure that your thawed pie won’t be soggy by baking or sauteeing the fruit in advance. Then strain away extra liquid so that it doesn’t soak the pie crust.

Par-cook pasta

Pasta absorbs water while it cooks. So if you freeze fully-cooked pasta, all that water breaks down the structure of the noodle and results in a mushy texture after thawing. The solution? Remove pasta from cooking water while it’s still “al dente” (or firm when biting into it). Then drain it well before freezing. Another tip: Freeze it separately from any sauces or liquids to limit additional absorption.

Eliminate Moisture

Get rid of as much moisture as possible. First, salt the vegetables to extract liquid. Pat dry before dressing with oil or marinade for cooking. If using frozen vegetables or fruits, thaw then dry before preparing the dish to rid of excess moisture. Once cooked, drain vegetables on paper towels before storing in an airtight container or plastic bag for freezing.

Avoid Frozen Insides

Make sure you reheat whatever you’re freezing-and-baking long enough to heat it all the way through. Reheat in the oven for about 1 hour longer than the original baking time.

Make Ahead Recipes That Freeze Well

Now that you’ve been briefed on the technique and have a plan, you’re good to go. Try out these OXO-tested recipes, or use the tips above to freeze your own make-ahead holiday dishes.

Whether you call it “stuffing” or “dressing,” this side dish can easily be made in advance, frozen and re-heated. Toward the end of its cooking time, turn up the heat to create a crisp and golden top.

Makes 2 quarts

Ingredients

1lb breakfast sausage, casings removed
2 onions, medium diced
5 stalks of celery, medium diced
1 apple, we prefer Granny Smith
1 tsp dried thyme
1 tsp dried sage
2 cups turkey or chicken stock
1/2 cup chopped pecans
2 eggs, beaten
3 tablespoons apple cider vinegar

Directions:

1.
In a large saute pan over medium heat, add sausage and break into bits with the edge of a wooden saute paddle. Continue to cook the sausage until it is no longer pink, 3-5 minutes.
2.
Add onion, celery, apple, and dried thyme and sage and cook until onions are beginning to turn translucent, 3-5 minutes. Remove sausage mixture and set aside in a large bowl.
3.
With the pan still over medium heat, add stock and use a flexible spatula to scrape any brown bits that cling to the bottom and sides of pan.
4.
Add stock and pecans to sausage mixture. Fold in the bread, beaten eggs, and vinegar until well combined. Pour into a 2 Quart Baking Dish with a lid.
5.
Cover and freeze.
6.
When ready to bake: Preheat the oven to 350 F.
7.
Remove lid and cover stuffing tightly with foil.
8.
Bake in preheated oven for 1 hour and 15 minutes, until stuffing is bubbling and middle is cooked through.
9.
Turn the oven up to 375F and remove foil.
10.
Bake until top is golden brown and crusty, about 10-15 minutes.


Homemade bread with a savory onion flavor?  Delicious and easy. Here’s how to make it!

Makes 3 quarts

Ingredients

1 cup whole milk
1/4 cup vegetable oil
1/4 cup granulated sugar
1 packet active dry yeast (¼ oz)
3 tablespoons butter
3 medium onions, sliced
1/2 tsp dried thyme
3 tablespoons apple cider vinegar
2 1/2 cups all-purpose flour, divided
1/4 teaspoon baking soda
1/4 teaspoon baking powder
2 teaspoons salt
½ teaspoon pepper

Directions:

1.
In a large saucepan, heat milk, sugar, oil, and sugar over medium heat until simmering, stirring occasionally. Immediately remove from heat and allow to cool until warm, between 105-110°F. Sprinkle yeast over the top of the milk mixture and allow to proof for 2 minutes. Stir in 2 cups of flour and cover with a towel. Keep in a warm place for 1 hour, until the dough has doubled in size.
2.
Meanwhile, melt butter in a large skillet over medium heat, and add onions. Stir occasionally, and cook until onions are caramelized, 15-20 minutes. Add thyme and vinegar, scraping any brown bits off the pan. Set aside to cool.
3.
After 1 hour, add remaining ½ cup flour, baking soda, and baking powder to dough, using hands to incorporate. Roll dough out on a lightly floured surface. Flour rolling pin and hands, and roll into an 18 inch by 12 inch rectangle. Brush with melted butter. Sprinkle onion mixture and cheese evenly over the top of the dough. Starting on the long edge of the dough, begin to tightly roll the dough toward you, forming a log shape. Slice off ends and discard (or bake immediately for a little snack). Cut log into 12 pieces and space out evenly in 2 Qt Baking Dish.
4.
Cover and freeze.
5.
When ready to bake: Preheat oven to 325F. Completely wrap dish with foil, which will prevent burning on the bottom of the rolls.
6.
Bake in preheated oven for 1 hour and 15 minutes, until rolls have risen and cheese is bubbling. The rolls in the middle should be cooked through.
7.
Turn the oven up to 375F and remove foil.
8.
Bake until top is golden brown, about 15-20 minutes.


Fruit pies freeze and bake fantastically. The long baking time allows for a crisp bottom crust. This method works with any store-bought pie crust, but here’s our favorite recipe.

Ingredients

12 tbs butter, cold (1 1/2 sticks of butter)
2 1/2 cups (10.2 oz) pastry flour (we’ve used cake flour as well)
1/2 tsp salt
1/4 tsp baking powder
1/2 cups cream cheese
3 tbs heavy cream
1 tbs cider vinegar

Directions:

1.
Cut butter into small (half-inch) cubes and place in refrigerator until ready to use.
2.
Place flour, salt, baking powder in a medium bowl and whisk to combine.
3.
Add cream cheese and rub the mixture between fingers to blend the cream cheese into flour until it resembles a coarse meal.
4.
Add the butter and use fingers to flatten the butter into thin flakes while tossing pieces together with flour. Sprinkle mixture with cream and vinegar, and use a spatula to combine until the dough comes together. Don’t worry about overmixing/overworking, this recipe needs some handling to come together. Feel free to do this by hand if it is easier.
5.
By the time you're done mixing, the dough should hold together in one piece and feel a little stretchy. Divide the dough into two and refrigerate for at least an hour, or up to 2 days.
6.
When ready to bake: Roll dough out into a 14 inch circle to use for either a top or bottom crust.


Freeze-and-Bake Apple Pie Filling

Tart apples, comforting cinnamon, a dash of pumpkin flavor—here’s how to create the perfect apple pie filling.

Ingredients

4 tbs butter (1/2 stick of butter)
2lbs Granny Smith apples, cut into ¼ inch pieces
2lbs Honeycrisp apples, cut into ¼ inch pieces
½ cup brown sugar
1 teaspoon vanilla extract
½ tsp pumpkin pie spice
¼ tsp cinnamon
2 tablespoons apple cider vinegar
3 tablespoons cornstarch

Directions:

1.
In a medium stockpot, melt butter over medium heat. Add apples, sugar, pumpkin pie spice, and cinnamon and stir to combine.
2.
Cover partially, and cook over medium heat, stirring occasionally, until the apple begins to soften and release juices, about 8-10 minutes.
3.
While the apples cook, use a mini whisk to combine vinegar and cornstarch until no lumps remain.
4.
Remove apples with a slotted spoon and place in a medium bowl. Simmer the juices for 2-3 minutes.
5.
Slowly whisk in vinegar mixture. Once the sauce has thickened, remove from heat, and toss with cooked apples. Allow to cool to room temperature before filling pie.
6.
Meanwhile, position rolled out pie crust in your pie plate.
7.
Pour apple filling into bottom crust. Cover with top crust, cutting out shapes or slits on the top, which will allow steam to escape.
8.
Cover and freeze.
9.
When ready to bake: Preheat oven to 350 F.
10.
Cover pie tightly with foil, and bake in preheated oven for 1 hour, until filling is bubbling and middle is cooked through.
11.
Remove foil and bake until top is golden brown, an additional 15-20 minutes.
12.
Allow pie to rest for 2 hours before serving.


Freeze-and-Bake Almond Cherry Pie Filling

Using frozen cherries is a great shortcut when prep time is short.

Ingredients

2lbs frozen cherries, thawed, drained
1 cup sugar
¼ cup cornstarch
½ teaspoon salt
½ teaspoon almond extract, optional

Directions:

1.
Mix cherries, sugar, cornstarch and salt in a medium stockpot. Allow to sit for 5 minutes.
2.
Place the pot over medium heat and cook, stirring frequently and lightly mashing cherries, until thickened. Take off heat and allow to cool to room temperature before filling pie.
3.
Meanwhile, position rolled out pie crust in your pie plate.
4.
Pour cherry filling into bottom crust. Cover with top crust, ensuring there are slits on the top, which will allow steam to escape.
5.
Cover and freeze.
6.
When ready to bake: Preheat oven to 350 F.
7.
Cover pie tightly with foil, and bake in preheated oven for 1 hour, until filling is bubbling and middle is cooked through.
8.
Remove foil and bake until top is golden brown, an additional 15-20 minutes.
9.
Allow pie to rest for 2 hours before serving.


Now that you’ve got the advance work done, read up on the most useful OXO cooking tools for preparing classic Thanksgiving dishes. And maybe use all the time you’re saving to throw a holiday brunch complete with festive seasonal coffees.

Additional reporting by Audrey D. Brashich.

Shop This Article

Shop This Article

loader
Loading...